And there’s a pretty steep curve attached to switching Operating Systems. This is especially the case when you’ve used a very dynamic, customizable operating system like Linux the majority of the time. In this article I’d like to address some of the issues noted, less than 12 hours after I’ve opened the box, to perhaps help others get reoriented.
For much of my computer-using life, I’ve been an Intel-based computer user. This means that I grew up on a Tandy (powered by an AMD 8088). Later in life, I had an Intel 80486. Then later still an AMD K6-2. The pinnacle was when I purchased and constructed an AMD Athlon XP machine, with lots of ram and a huge harddrive. I don’t enumerate these to look impressive, because, honestly, it isn’t. We could probably go round and round with old-timers who still cringe hearing “Shuffle the Deck” and all the other pre-transistor-era computer science. My point instead is to illustrate that I, like many people, have been very sheltered when it comes to operating personal computers. From the systems above, I am obviously able to only run a tiny set of the available operating systems out there.
My operating system exposure is a bit more diverse. I grew up on DOS, then moved to Windows 3.1. I skipped Windows 95 and went right to Windows 98. This was then upgraded to Windows 2000 dual-booting Linux, and then Windows XP. These were all that were available in my home. Outside of that, I got to dabble a bit with OS/2, BSD, Solaris, and a tiny bit of BeOS. At school, and nowhere else, I got to use some flavor of Mac. A 68030 I believe. Running some terrible version of MacOS, somewhere between System 6 and Mac OS 9, or maybe even earlier. There was a short window of time when my cousin got an iMac, and that’s about all the MacOS exposure I had. Even more, it was all the exposure I needed to know that I would never personally use a Macintosh.
Then another striking development happened. They (Apple) decided that they were going to ditch the PowerPC, and move over to Intel for their microprocessor needs. To me, this, like many other things, was a two edged sword. On the plus side, I am far more familiar with Intel-based systems, especially when it comes to programming them to do things. On the minus side, there’s always been that tiny part of me that wants to destroy all x86’s because of the insanity of the architecture. For the RISC/CISC zealots, this is a matter of honor. For the rest of people (including those who look at the numbers), they both basically converged into the same thing, and neither side clearly won (like so many other 2-option systems.) Either way, this move really started wearing down the mental barrier that I had against Macs for so long.
Mid-way through High School I pretty much ran Linux exclusively on my machines. My family exclusively ran some flavor of Windows. This pattern continued up until this afternoon. I finally decided that there just wasn’t any hope for Linux on the desktop in the foreseeable future. There hasn’t been any hope for anything in the Windows camp for a long time. And, strangely enough, in the place where there wasn’t any hope to begin with, a tiny glimmer of hope (or at least chance) sparked in the neglected Mac corner.
With this in mind, with a few dollars in hand, and with a determination to figure out what it takes to get a Mac just the way I like it, I set out to document some observations.
First things first, I am using a MacBook. The most basic one you can purchase at this time, which is a 1.83GHz Intel Core 2 Duo with 512MB of RAM and a 60GB Harddrive. No bells, no whistles. The only addition is a 5-button USB mouse since, no matter how well a Mac might work out, a 1-button mouse is about as useful as a 1-hemisphered brain.
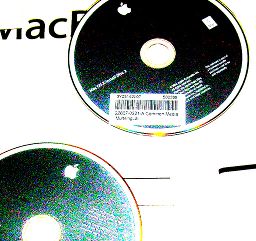
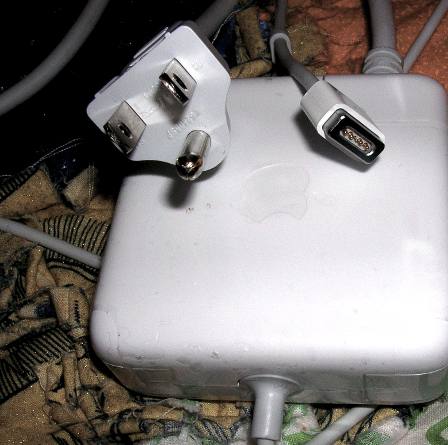
Out of the box I have the MacBook, some paperwork, and a charger. That’s about it. I turn it on, plug in the charger (yes, in that order), and see what it does. Since this is a first boot, I figure it’ll take a while, which it did. It then ran through a configuration procedure which was just about the same as any other operating system’s. The only bummer here was the lack of setting a decent hostname (which, by the way, can be done by clicking the Apple thing, System Preferences…, Sharing, and then changing Computer Name.) It eventually tries to trick you into getting a .Mac account. No thanks. I did like the difference between the User’s “Long Name” and “Short Name,” which correspond to Given Name and username respectively. Windows XP does not do this, which is really annoying (my username is always cwright.)
Then I’m essentially brought to an empty desktop. There’s the harddrive icon, and the huge dock at the bottom. System Update starts automatically, which is a good idea. I had to upgrade from 10.4.8 to 10.4.9, along with a number of other upgrades.
After that, whatever happens is all up to me. From prior hacking, I know that the terminal utility is in /Applications/Utilities/Terminal.app. This gets put onto my dock. I also use Firefox as my web browser, no matter how good Safari is (though Safari will come in handy for web development testing, but I would assume that it has far fewer quirks than Internet Explorer.) To get Firefox, I fire up Safari, and away I go, all the way to mozilla.org. Once downloaded, I am presented with a .dmg. Woah. What the heck is that? Also from prior hacking, I know that OS X uses .dmgs as Disk iMaGes. To the windows users, the idea is like this: a disk image is a File that contains a File System. Real operating systems allow you to “mount” these filesystems, so you can access their files. It’s kind of like reading the files out of a .iso without burning it to a CD. So I’ve got this .dmg, and I have no idea what to do to get them to work. So, I double click it. It goes through some verification stuff (which takes way too long, in my opinion), and then mounts it, placing a mounted device icon on the desktop, and opening a Finder windows showing its contents. Finder is the equivalent of Explorer in Windows land. In Linux, it’s basically a windowed file manager, kind of like KDE or Gnome. Inside the Finder window, I see exactly 1 icon: The familiar Firefox Icon. If I double click it, Firefox starts, and works like normal. Cool! But wait, if I unmount the .dmg, I can’t run Firefox. Surely I don’t need to mount it every time, requiring a .dmg to be floating around. That’s insane! Since there doesn’t appear to be any kind of installation function (not even doing the taboo right-click), I try the next best thing: drag the file out of the window, on to the desktop. This does some copy stuff, and gives us a nice working copy of Firefox. So for this, installation was pretty simple. I simply drag the icon somewhere more permanent. Eventually, Firefox found its way in to /Applications. Since it also got linked on the dock, I don’t care too much where the original is.
This brought me to my second configuration: How do I get the Dock to be less obtrusive? Thankfully, System Preferences, which can be found by clicking the Apple icon in the corner, has a Dock icon that allows you to tweak it. With the Dock tamed, I set out to do some more customizations.
.mpkg appears to be a Installation package. After a bunch of copying, Xcode is installed. But to where? This took me a moment, but there’s a folder in the root directory called “Developer” which has Xcode and all that stuff. Pretty simple.
I am accustomed to some kind of “My Documents” folder. Windows calls it “My Documents,” Linux calls it “~”, and either way, that’s where my files go. Figuring I’d need to make a link (“Shortcut” to windows users, “Symbolic Link” or “symlink” to Linux users) to it on the desktop, I fired up the harddrive icon, since I know it has that handy list of places on the left-hand side of the window. One of those handy places happens to be my home directory. I click and drag this icon, only to find that my home directory is now removed from the list of handy places! And what’s more, it’s not on the desktop either! Fortunately I knew that my home directory was /Users/cwright, so I navigated to that folder, and dragged it into the List of Handy Places list. I then tried various control key combinations to get a shortcut on the desktop. Shift and the Apple key give a weird error. ctrl forces the right-click menu to come up (I am assuming this is how unibutton mice users do things. This assumption assumes that unibutton mice users actually do things. I have no evidence for this.) The correct key to create a shortcut is alt/option. This is the same as Windows. With my home directory link on the desktop, I continue on my quest.
With these basic settings in hand, I am ready to begin finding out the more interesting aspects of MacOS X. Check back next week for Part 2.